
Spring Boot is one of the most powerful Java EE frameworks that aims to facilitate the development of new application. It brings all the power of the Spring stack (Spring dependency injection, Spring data JPA, Spring ORM, Spring MVC…) combined with an embedded Tomcat/Jetty server avoiding you heavy deployment.
One of the strong point of Spring Boot is the automatic configuration. In fact, you have just to respect some naming conventions and Spring Boot will do the job for you all by giving you the flexibility to override the defaults configurations if you want.
This tutorial will present a basic “hello world !” application using Spring Boot.

The tutorial source code is available on Github. Download the source
Table of contents
Creating the project
Using Spring Tool Suite (STS) or Spring IDE
If you are using Eclipse IDE, you can install Spring IDE or Spring Tool Suite (STS) from the Eclipse Market place to work easily with Spring projects. Below steps to follow to create a Spring Boot project :
- Open Eclipse and go to File -> New -> Other -> Spring -> Spring Starter Project
- Name your project. Example :

Creating Spring Boot project
- Click Next and Finish to end the creation
Basic Eclipse
If you don’t have Spring IDE or Spring Tool Suite (STS) installed on your Eclipse, you can create a Spring Boot structure manually by creating a Maven project. Below steps to follow :
- Open Eclipse and go to File -> New -> Other -> Maven-> Maven Project and click Next >
- On the next window, choose Create a simple project (skip archetype selection) and click Next >
- Fill the Maven project form as below
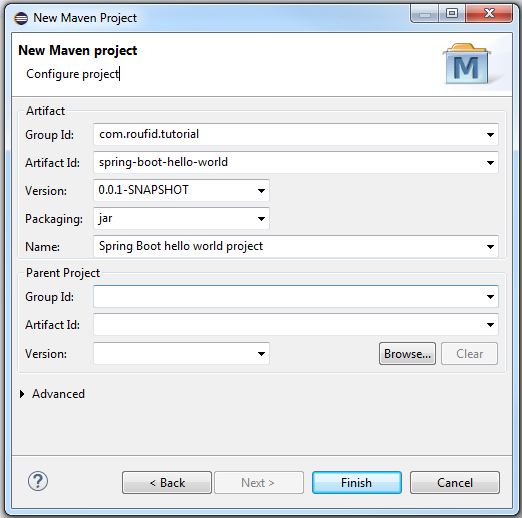
Spring Boot Maven project creation
- Click Finish to create the project.
Project structure
Create all files you miss to make your project corresponds to the following :
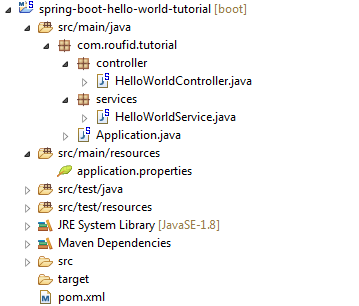
Spring Boot project structure
Pom.xml
Update your pom file to make it corresponds to the following :
|
1 2 3 4 5 6 7 8 9 10 11 12 13 14 15 16 17 18 19 20 21 22 23 24 25 26 27 28 29 30 31 32 33 34 35 36 37 38 39 40 41 42 43 44 45 46 47 48 49 50 51 52 53 54 55 56 57 58 59 60 61 |
<?xml version="1.0" encoding="UTF-8"?> <project xmlns="http://maven.apache.org/POM/4.0.0" xmlns:xsi="http://www.w3.org/2001/XMLSchema-instance" xsi:schemaLocation="http://maven.apache.org/POM/4.0.0 http://maven.apache.org/xsd/maven-4.0.0.xsd"> <modelVersion>4.0.0</modelVersion> <groupId>com.roufid.tutorial</groupId> <artifactId>spring-boot-hello-world-tutorial</artifactId> <version>0.0.1-SNAPSHOT</version> <packaging>jar</packaging> <name>spring-boot-hello-world-tutorial</name> <description>Spring Boot hello world project</description> <!-- Inherit from the spring-boot-starter-parent --> <parent> <groupId>org.springframework.boot</groupId> <artifactId>spring-boot-starter-parent</artifactId> <version>1.4.2.RELEASE</version> </parent> <properties> <project.build.sourceEncoding>UTF-8</project.build.sourceEncoding> <project.reporting.outputEncoding>UTF-8</project.reporting.outputEncoding> <java.version>1.8</java.version> </properties> <dependencies> <!-- Core starter, includes auto-configuration support --> <dependency> <groupId>org.springframework.boot</groupId> <artifactId>spring-boot-starter</artifactId> </dependency> <!-- Spring MVC starter that embeds a Tomcat server --> <dependency> <groupId>org.springframework.boot</groupId> <artifactId>spring-boot-starter-web</artifactId> </dependency> <!-- Spring test to make unit testing. Includes JUnit, Hamcrest and Mockito --> <dependency> <groupId>org.springframework.boot</groupId> <artifactId>spring-boot-starter-test</artifactId> <scope>test</scope> </dependency> </dependencies> <build> <plugins> <!-- Make the project as an executable jar --> <plugin> <groupId>org.springframework.boot</groupId> <artifactId>spring-boot-maven-plugin</artifactId> </plugin> </plugins> </build> </project> |
Spring Boot main class : Application.java
|
1 2 3 4 5 6 7 8 9 10 |
import org.springframework.boot.SpringApplication; import org.springframework.boot.autoconfigure.SpringBootApplication; @SpringBootApplication public class Application { public static void main(String[] args) { SpringApplication.run(Application.class, args); } } |
The Application.java file would declare the main method that uses SpringApplication.run() method to launch the application. It’s annotated with @SpringBootApplication which is equivalent to using @Configuration, @EnableAutoConfiguration and @ComponentScan all together.
Spring component : HelloWorldService.java
Let’s consider the following basic Spring component containing the method sayHelloWorld() that returns a String.
|
1 2 3 4 5 6 7 8 9 10 11 12 |
package com.roufid.tutorial.services; import org.springframework.stereotype.Component; @Component public class HelloWorldService { public String sayHelloWorld() { return "Hello World !"; } } |
Spring MVC Controller : HelloWorldController.java
Below a simple Spring MVC controller containing a method that will be called on the root context of our application. This method calls the helloWorldService created in the previous section that we inject with the annotation @Autowired
|
1 2 3 4 5 6 7 8 9 10 11 12 13 14 15 16 17 18 19 20 21 |
package com.roufid.tutorial.controller; import org.springframework.beans.factory.annotation.Autowired; import org.springframework.stereotype.Controller; import org.springframework.web.bind.annotation.RequestMapping; import org.springframework.web.bind.annotation.ResponseBody; import com.roufid.tutorial.services.HelloWorldService; @Controller public class HelloWorldController { @Autowired private HelloWorldService helloWorldService; @RequestMapping("/") @ResponseBody public String helloWorld() { return helloWorldService.sayHelloWorld(); } } |
That’s all, the application is ready now to use !
Running the application
- Right-Click on your project -> Run As -> Spring Boot App or Right-Click on Application.java -> Run As -> Java Application
You must see Spring Boot starting logs on the console as below :
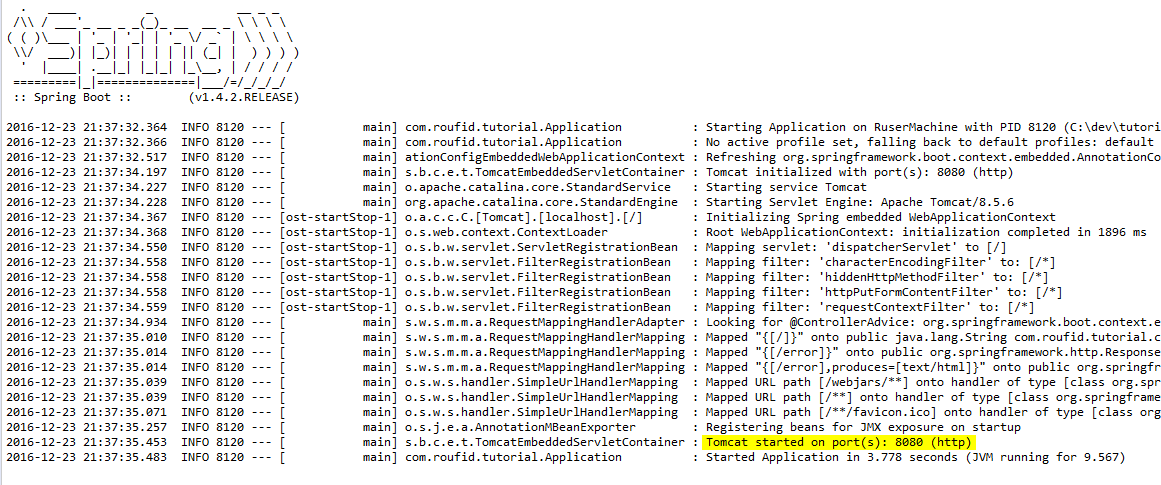
Spring Boot starting logs
Wait for the finish and go to : http://localhost:8080/
You must see, “Hello World !” as below :
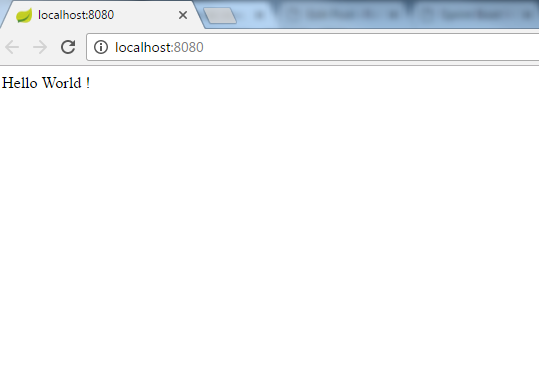
Spring Boot hello world
Notice that there wasn’t a single line of XML nor a web.xml file.
The tutorial source code is available on Github. Download the source